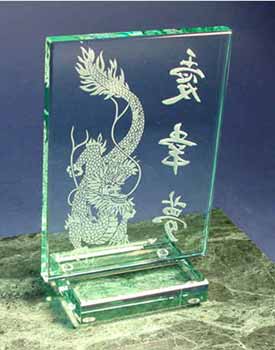
| Photo Resists EtchMaster(R) is a full line distributor of photo resists for glass etching that represents the best the industry has to offer. These are the same photo resists we use ourselves and that we teach students how to use in our intensive photo resist seminars. Photo resists have revolutionized the glass etching business, especially the etching of smaller pieces of glass. Photo resists allow you to easily recreate almost any design, of almost any complexity, as an etching resist that can then be used for abrasive etching a design onto almost any kind of glass. No hand cutting is required to get incredibly fine details, text or lettering, and it is easy to make 2 resists of exactly the same design, or 50, or 5000. We do not recommend these resists for beginners! Even though the resist process is not extremely difficult, it is involved. You should have a good grasp of the abrasive etching process, you should understand the process of exposing and developing the resist, and you should understand how to select the right photo resist for your project. There are always things that go wrong in the learning process and it is never just one thing, but usually 2 or more that go wrong at the same time, making it a real challenge to troubleshoot what the problem is (problems are). |
|
| How to make and use photo resist to etch glass is the subject of a very intensive 3 day seminar we teach, which covers not only the process of creating the resist, but also computer applications and design considerations as well as abrasive etching. If you don't already know how to use this resist, we recommend you take this class or learn from a competent person, or be ready to sacrifice a noticeable amount of material to the process of experimentation (which most people do anyway). | |
|
|
|
| The equipment you need | |
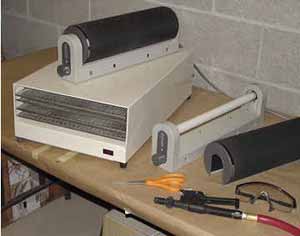
| The equipment required for processing photo resist is neither extensive nor expensive, considering the labor saving benefits it offers. You simply need an exposure unit, a washout system of some type, a dryer, and miscellaneous small tools like stencil knives, scissors, etc. Of course, in addition to the processing equipment, you will need a source of designs (printed or electronic clip art) and access to a reasonably up-to-date computer with graphics software. You will also need a good quality laser or inkjet printer. If you draw your own patterns and don't use a computer, you can still use photo resist - by drawing on translucent drafting film as your original. Directly below we have given a complete list and explanation of the equipment and materials required. You can purchase the products right from the list at the bottom of this page and order everything you need to get started.
|
|
| Equipment and materials you need for creating your own photo resist.
|
| Basic Equipment: This is the equipment you will need to start out with. As you do more etching, you may need to upsize some of this equipment, but only if you really go big time, with daily output of etched items exceeding 75 or 100 units (depending on size of etched area). In other words, you will probably stay with this equipment for years before thinking about upgrading. If you do want to setup for high production, contact us for specific recommendations. |
| Unit
|
Function
|
|
Ultra Violet exposure system with timer for exposing the photo resist |
|
Sprayer attachment for garden hose connection that delivers especially fine spray and higher pressure needed for washing out photo resist |
Drying oven |
Four shelves of drying room for photo resist film after it is washed out. Controlled temperature for photo resist. |
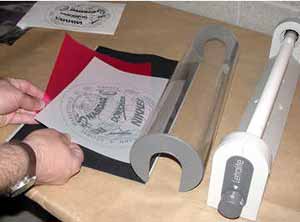
| Artwork Materials: You have to print your artwork out from your computer either with a laser printer or an inkjet printer, on special "paper", to get the darkest print possible. If you want to draw your own original artwork and not use a computer, get the drafting film and use India ink with a technical drawing pen (like a Rapidograph(R). | |
|
This basic "tracing paper" is possible to use, but quality is not consistently good. We do not carry this material for quality reasons. |
|
Much better quality material for your laser printer. More even deposit of toner, less tendency to flake off with repeated use, but can lack solidity in larger areas (depending on printer). |
|
This film has only been on the market a short time, but it is considered the best material to use. Several different levels of quality are available. We highly recommend the waterproof inkjet film, since it won't smudge if it gets wet. |
| Photo resist: This is the actual light sensitive film you use to create the resist. There are two basic types - one that requires a water washout and another that doesn't. Furthermore, the resist that washes out with water is divided into two categories, self-adhesive and non-adhesive, and each one of these is available in several thicknesses. Each resist has its own advantages. You will probably find that you use different resists in different situations, since no one resist does everything. Most people getting into photo resist eventually try out each one to see what they like best for each particular job, and we go over each one thoroughly in our photo resist seminars. Most of the etchers we teach and that we talk to started with and still use the UltraPro. The more experience someone has, the more likely they have also started using the other resists for specific applications. |
|
| Material
|
Characteristics
|
| UltraPro (Purple or Blue) | Water washout, self adhesive. Purple comes with activated adhesive. Blue comes with adhesive that activates with water. Both have protective slip sheets on the back |
|
This paper allows you to store resists as you make them, without ruining the adhesive on the resist. |
| ImagePro | Non-adhesive; use with either the brush-on liquid adhesive or dry transfer sheet adhesive. |
With IP, you will also need liquid or dry transfer adhesive |
The dry adhesive is fairly new and easy to use if you haven't used photo resist before. It is much faster, since you don't have to allow time for it to dry. We only recommend liquid in certain special circumstances. |
| RapidMask | Non-water washout, self adhesive. RapidMask now comes in 2 different types - RapidMask II, which is 4 mils thick (safer for deeper carving than the old 3 mil RM), and RapidMask HD, which is only 2 mils thick and is primarily for use in creating halftones (reproduction of photos) etched on glass. |
Remember this about RM: |
Light sensitive until blasted. Should be handled, stored and blasted in low light situations or yellow light. |
| Note: Both the ImagePro and UltraPro purple are available in 3 mil and 5 mil. Three mil gives faster processing time and higher detail, but shallower blasting. The 5 mil is slower to process and doesn't give as fine detail, but allows you to carve much deeper. UltraPro Blue comes in 4 mil and 6 mil, giving a higher margin of safety than the 3 or 5 mil materials. RapidMask now comes in 2 mil (RapidMask HD, for use in reproducing halftones) and 4 mil (RapidMask II), which is better for standard etching techniques.. | |
| ** For more information and to purchase an item, click on the code link for that product. To add one of an item to your shopping basket right away,
click on the "Add One to Basket" button. After clicking the button, you will be brought back to this page. To view the items in your basket at any time, click on the "Basket Contents" button at the top of every page. |
|


